Quest Upload
Continuing on from having uploaded a PC version of the Avatar, this guide continues with uploading it's Quest counterpart.
Step 1 - Open the Quest Scene
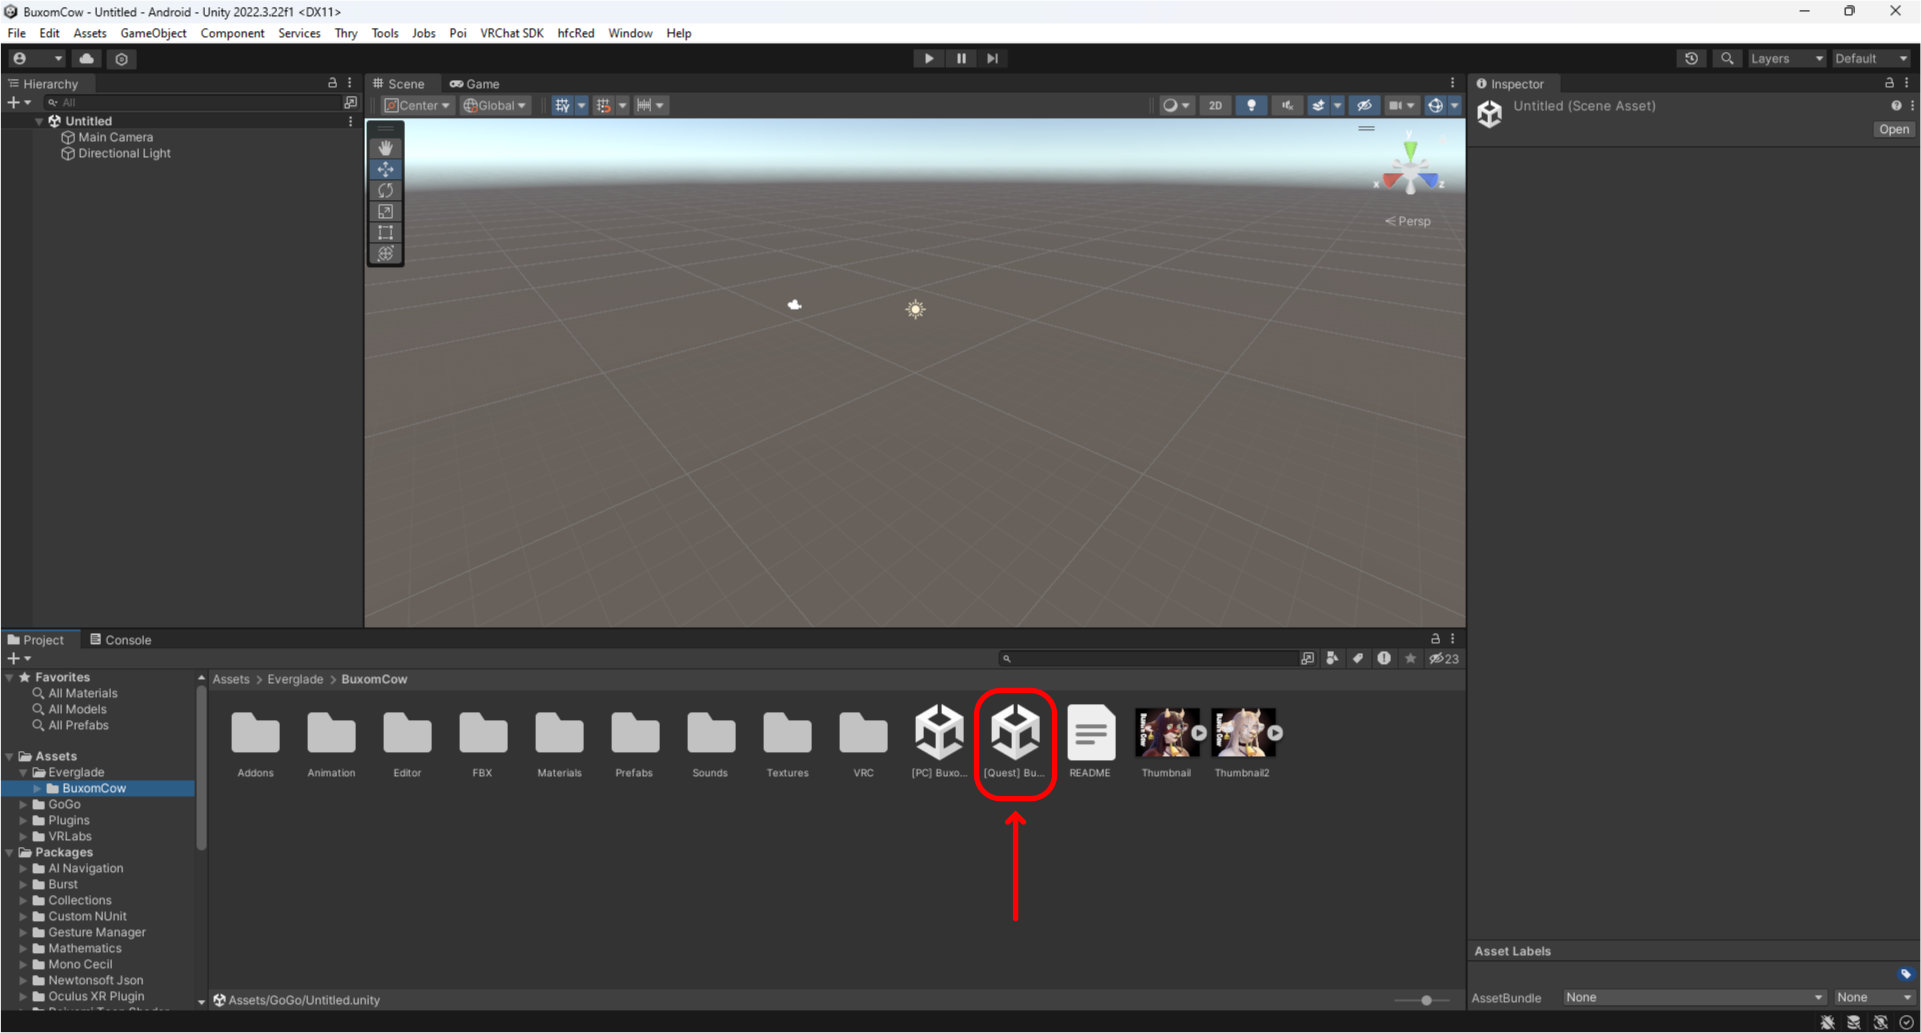
Open the Scene for the Quest version of the Avatar. You can find the Quest scene alongside the PC Scene in the Avatar folder, prefixed with "[Quest]".
For the Hex Cat, the Quest version can be found in the same Scene as the PC version. This is because in recent versions of the VRChat SDK, it is now desirable for both versions to be in the same scene in order to use the new multiplatform build process feature.

Step 2 - Copy and attach the Blueprint ID
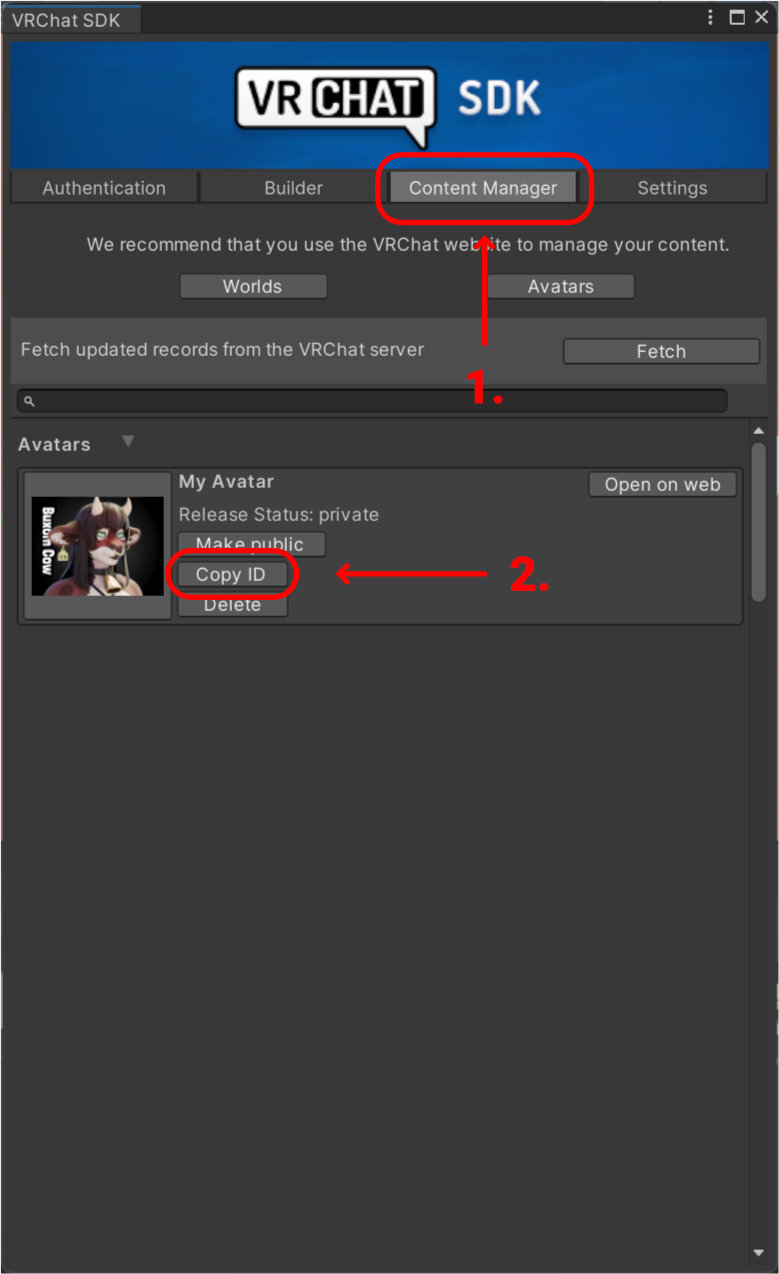
Open the VRChat SDK Control Panel and navigate to the "Content Manager" tab. Assuming you have already uploaded the PC version, search the list for the Avatar you would like to upload a Quest version for. Once you have found it in the list, click the "Copy ID" button to copy it's Avatar ID into your clipboard.

Alternatively, you can copy the ID from the Pipeline Manager (Script) of the PC Avatar (an ID is attached once it is uploaded).
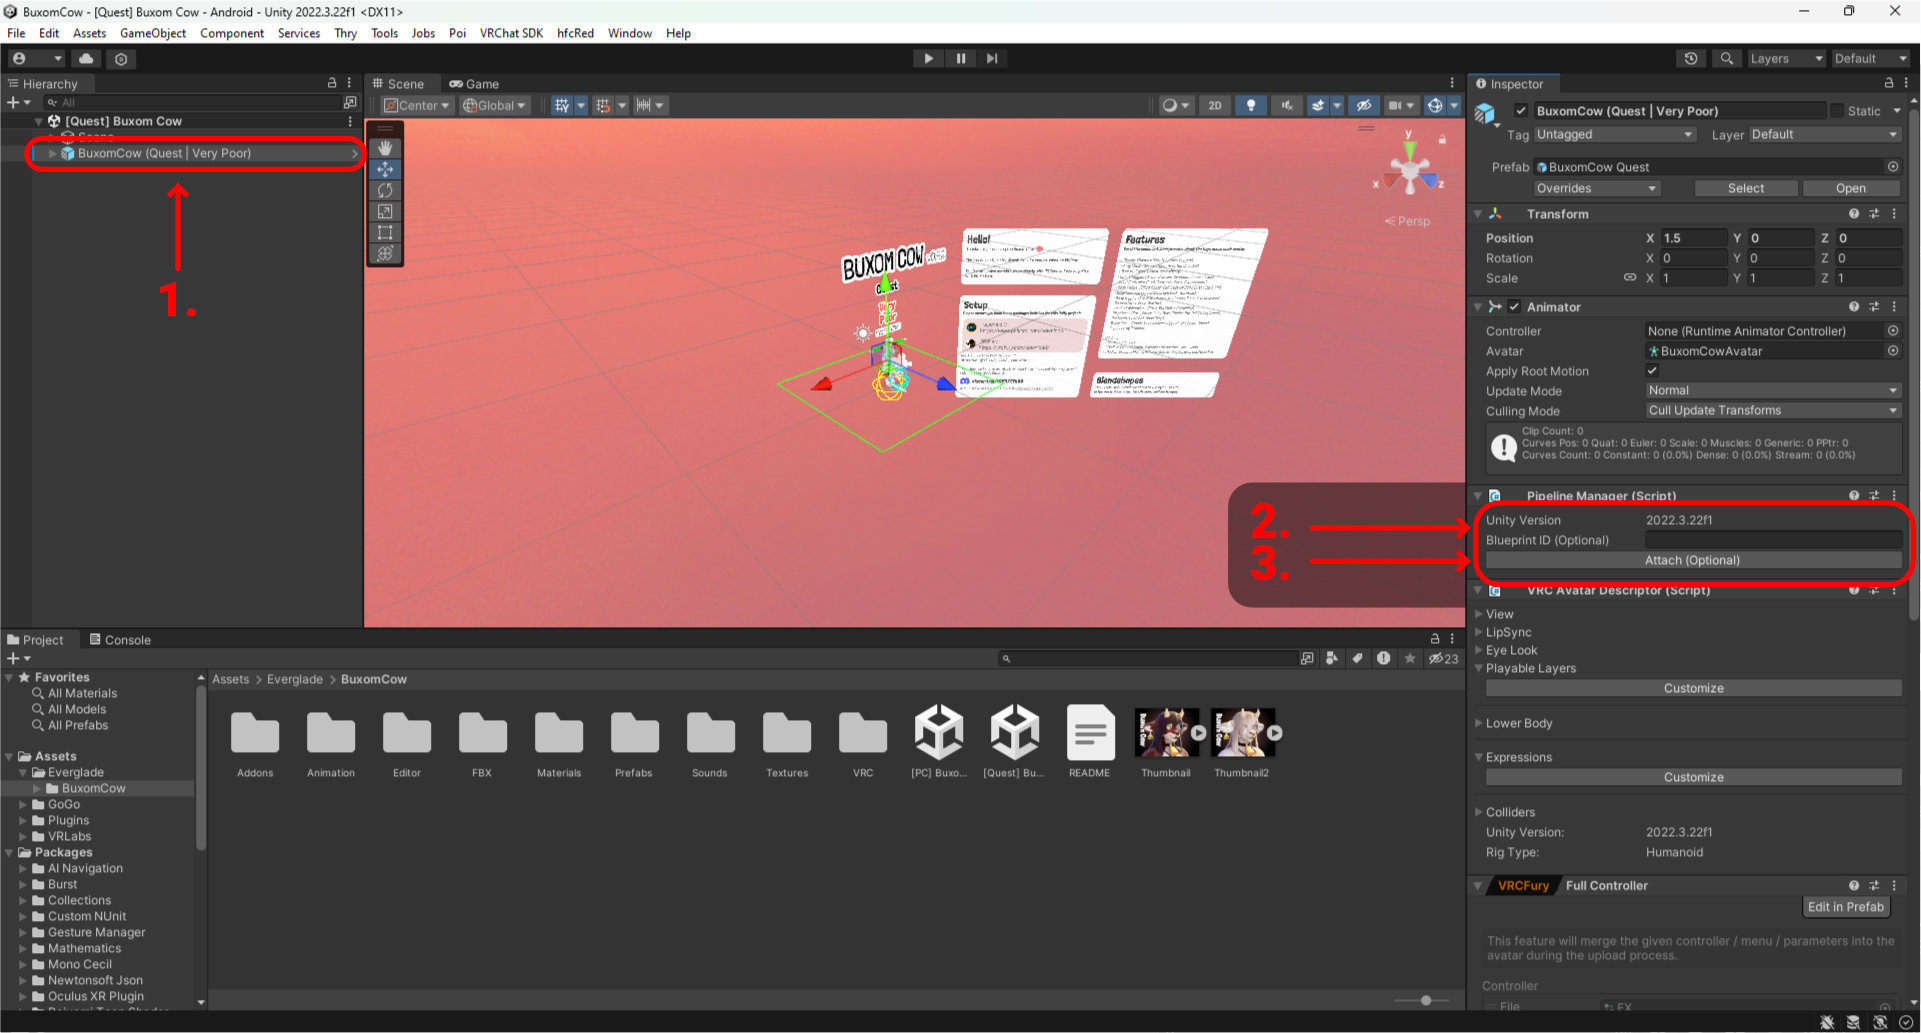
You need to attach this ID to the Quest version of the Avatar to link it to its PC counterpart. To do this you need to:
- Select the Quest Avatar in the Hierarchy panel
- Find the Pipeline Manager (Script) in the components list
- Paste the ID in the "Blueprint ID" text box and click the Attach button
The Pipeline Manager (Script) will update to show the ID you entered in plain text.

Step 3 - Publish
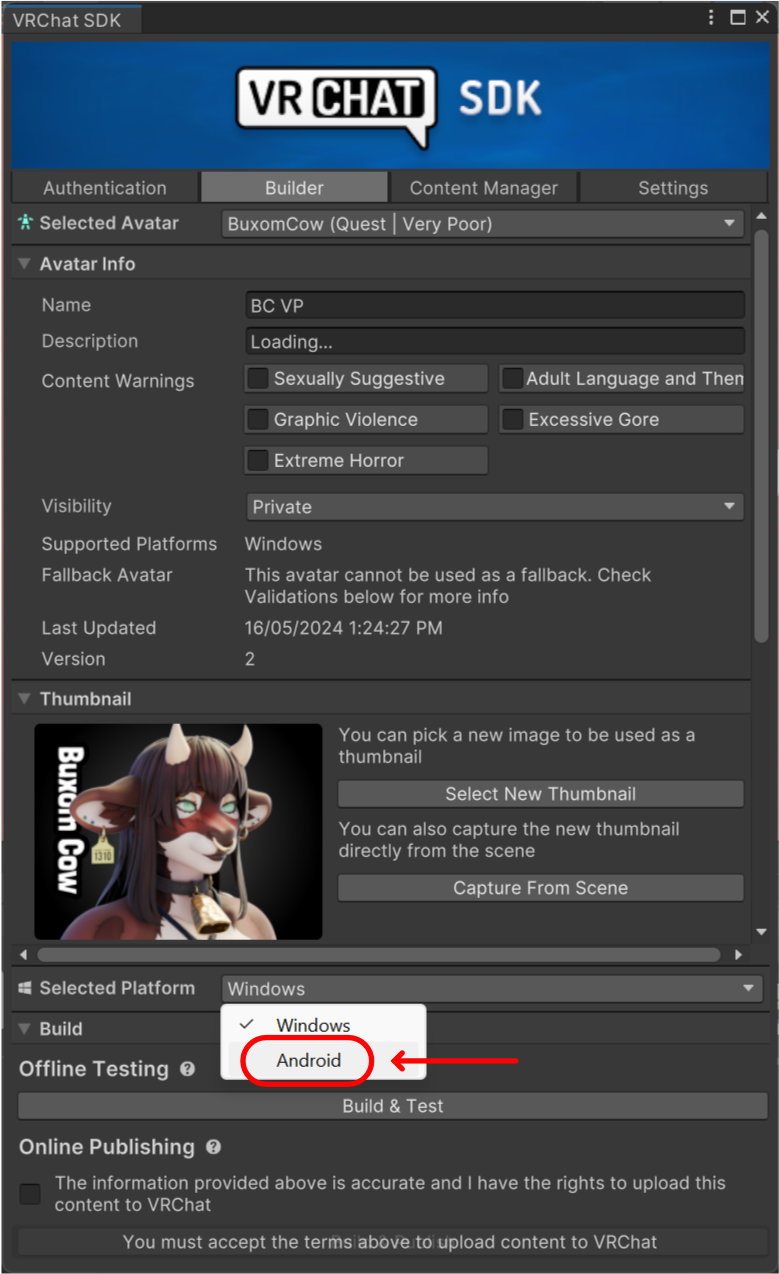
You can now return to the VRChat SDK Control Panel. With the Quest Avatar selected, it will load the information from the PC version, such as its name and thumbnail. Near the bottom of the panel, change the selected platform to "Android" - the platform for Quest devices. Switching platforms may take a while to process, especially for the first time.

You can now agree to the terms and click the "Build & Publish" button. All done! The Avatar should now be available ingame for both PC and Quest.