Uploading an Avatar
This guide will help to upload an Avatar to VRChat from an Avatar's .unitypackage. If you aren't set up with the Creator Companion or Unity yet, check out the Getting Started guide.
Step 1 - Create an Avatar Project
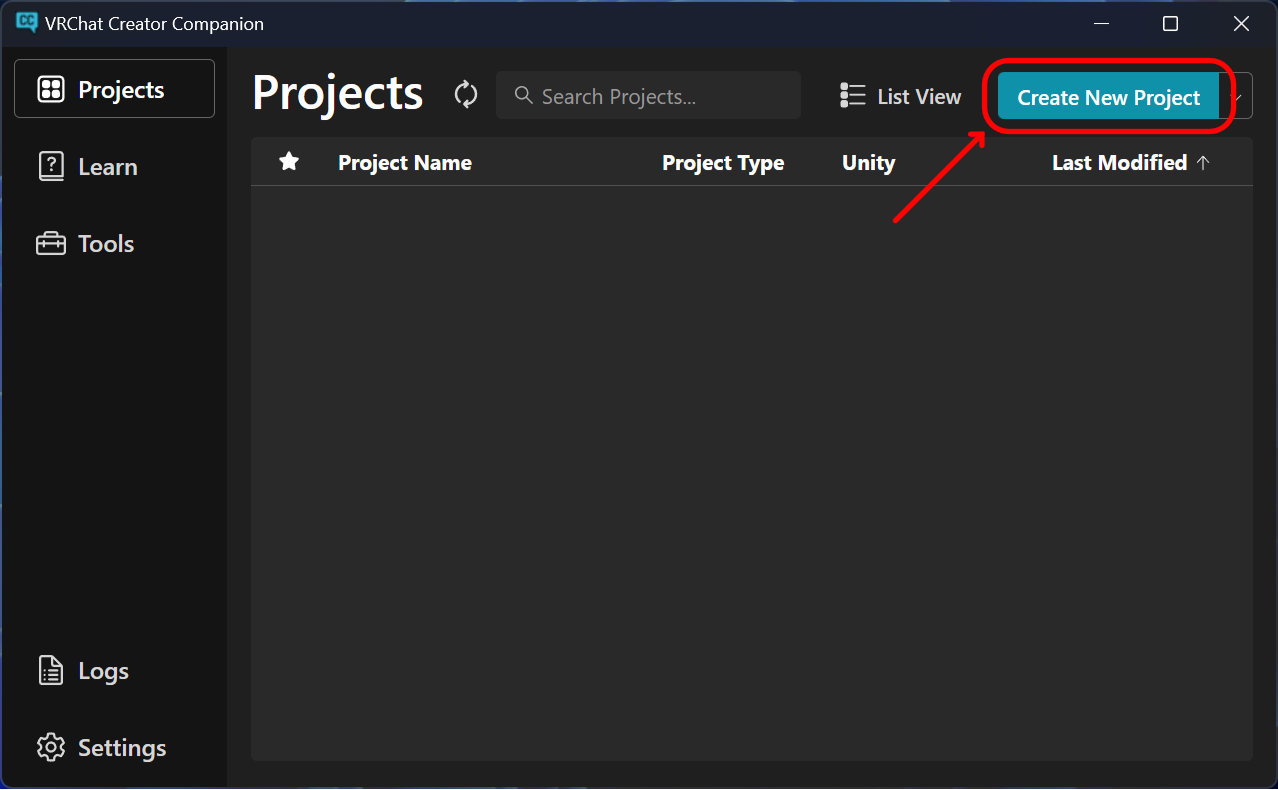
Click the "Create New Project" button in the top right of the Projects page.
Select the "Unity 2022 Avatar Project" template. Be sure to give your project an appropriate name like the name you'd give the Avatar to keep projects organised from others.
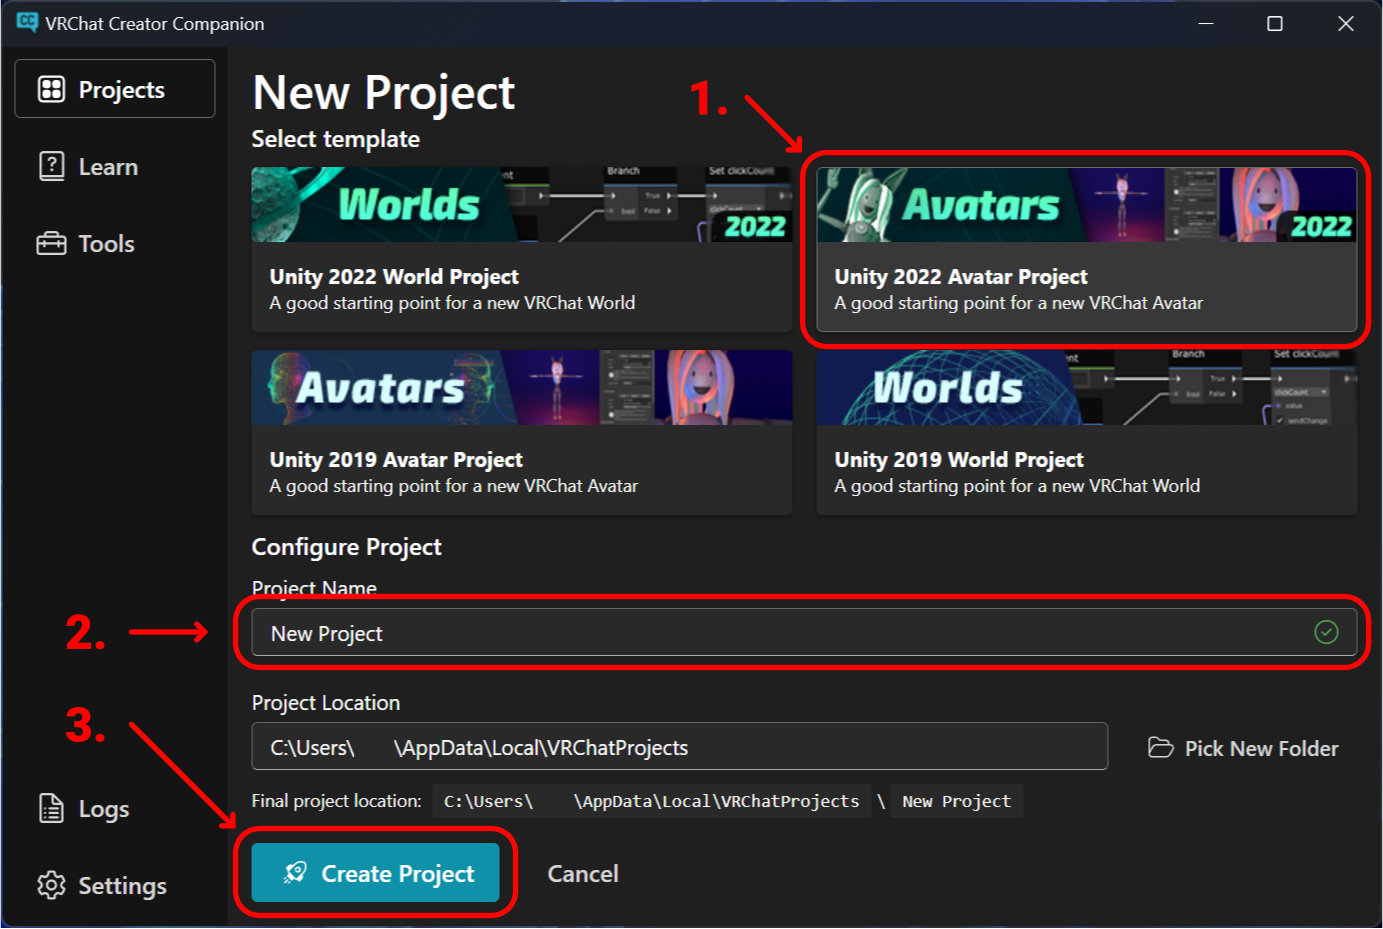
The project has been created! From here you can manage the packages that are a part of the project. But first we need to add some additional packages to the VRChat Creator Companion!
![]()
Step 2 - Import any required packages
The required packages vary between avatars, but for Everglade you will only need to add Poiyomi and VRCFury. Firstly, you can add Poiyomi by following "Method 2. Creator Companion" on Poiyomi's download page. You will need to click "Add to VCC". It should open a prompt in the VRChat Creator Companion to "Add Repository". Click "I Understand, Add Repository" to continue.
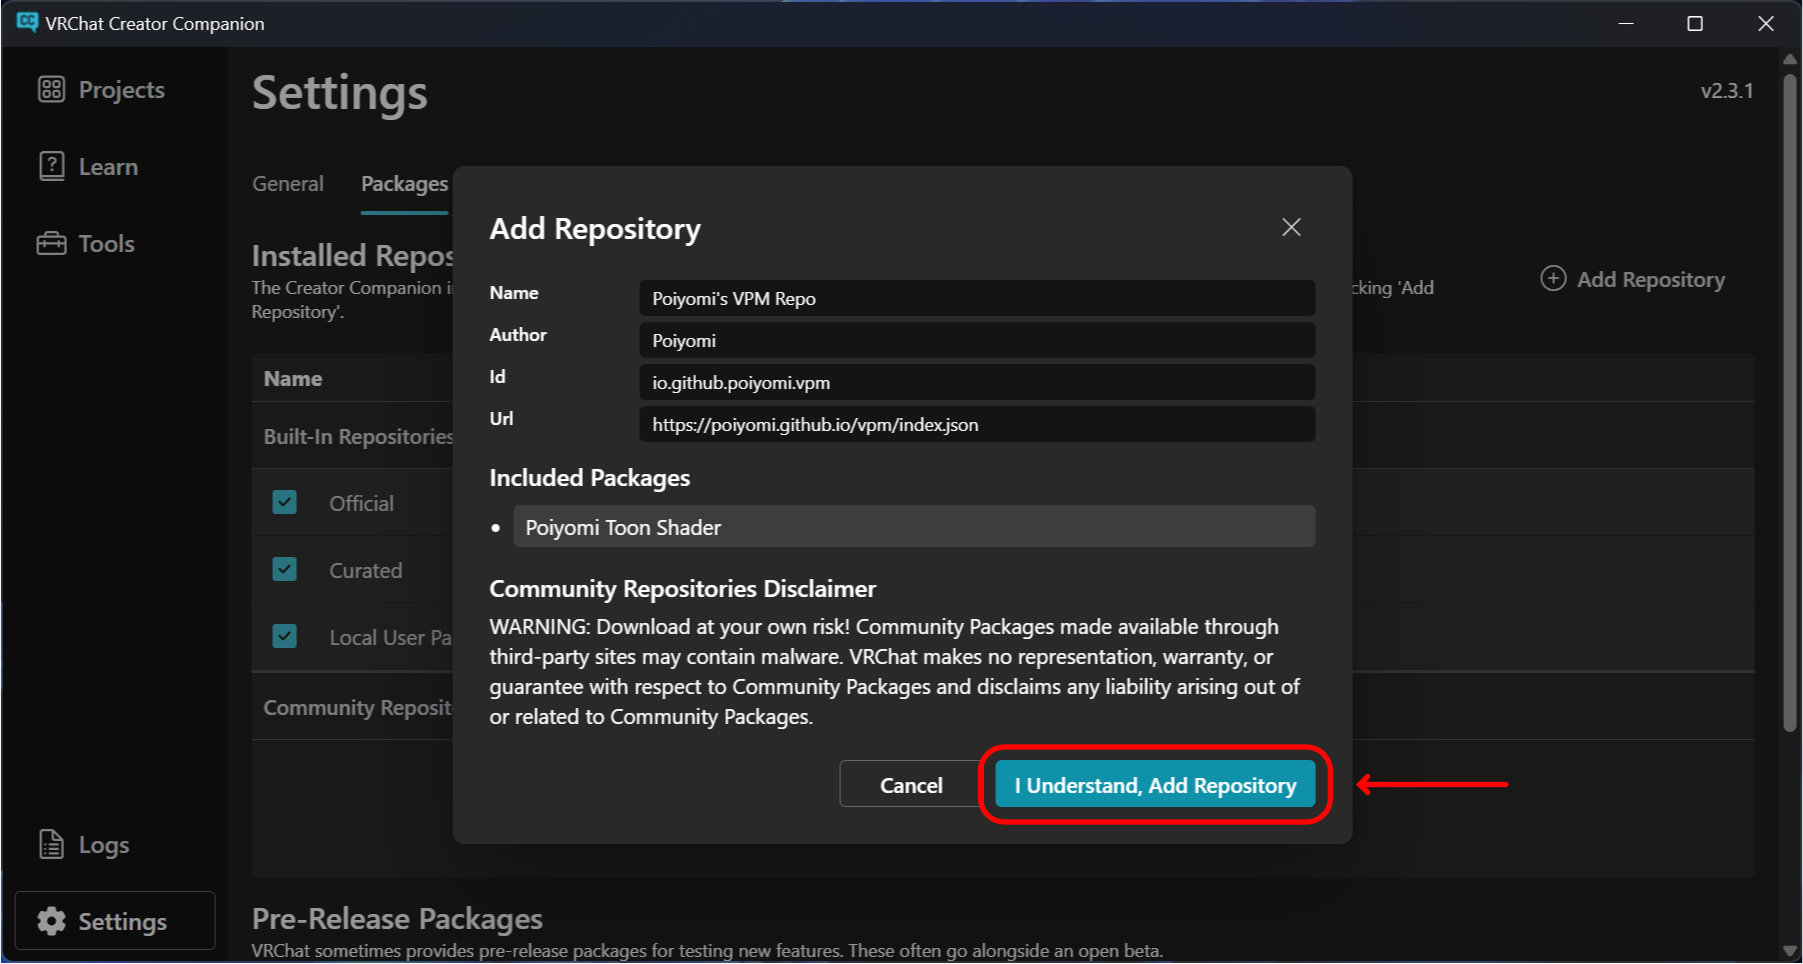
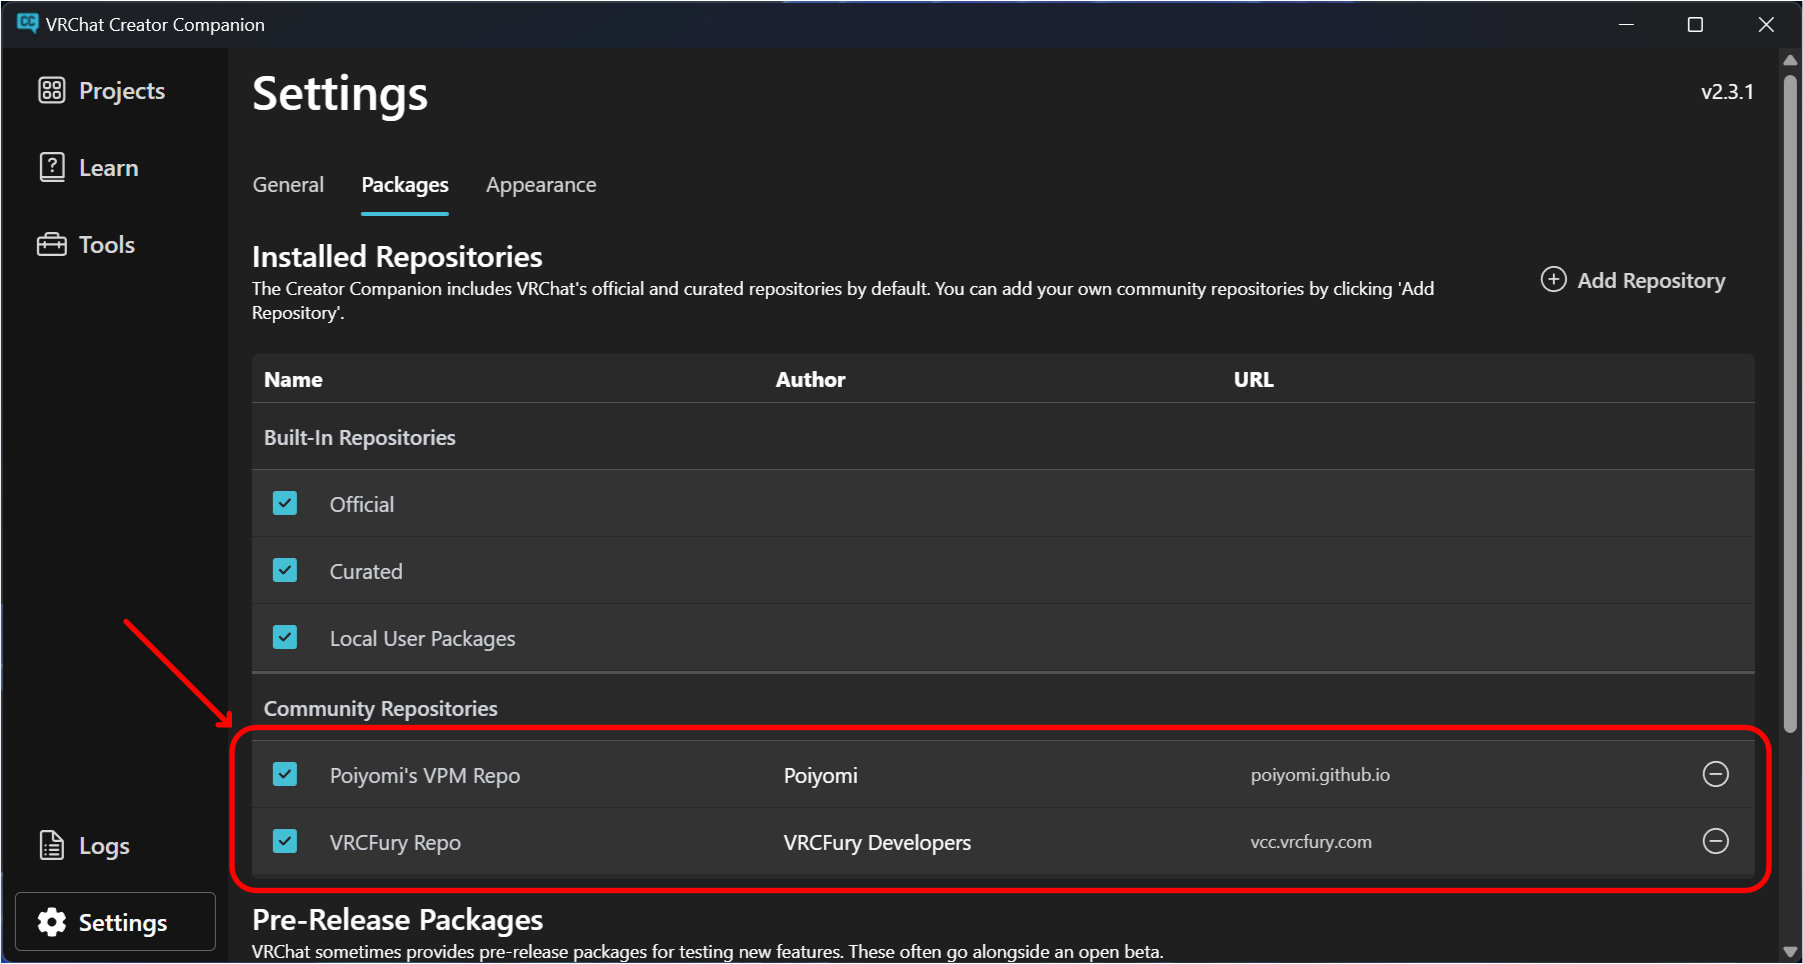
Now you must do the same for VRCFury. You can find the option to add VRCFury to the Creator Companion from their download page, to add the repository as before. After doing so, you should now at least see both "Poiyomi's VPM Repo" and "VRCFury Repo" in the Community Repositories list.
Now you can return to your projects list to add those packages to your project. Find your avatar project and click on "Manage Project".
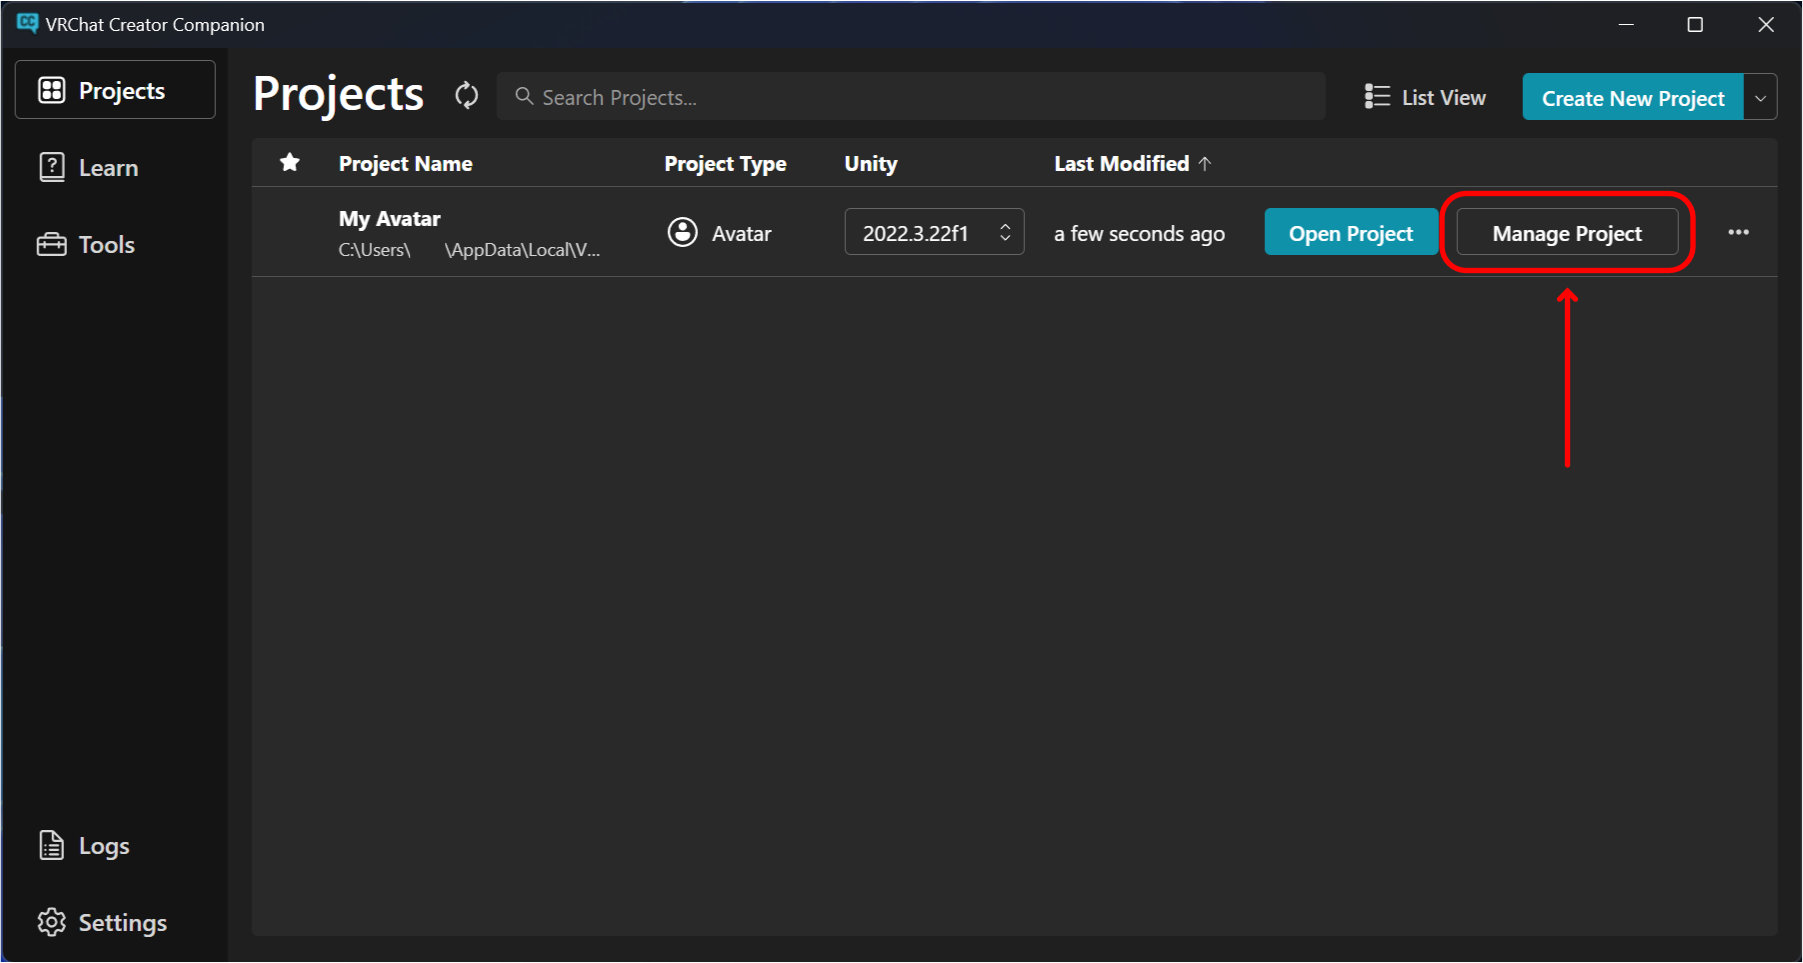
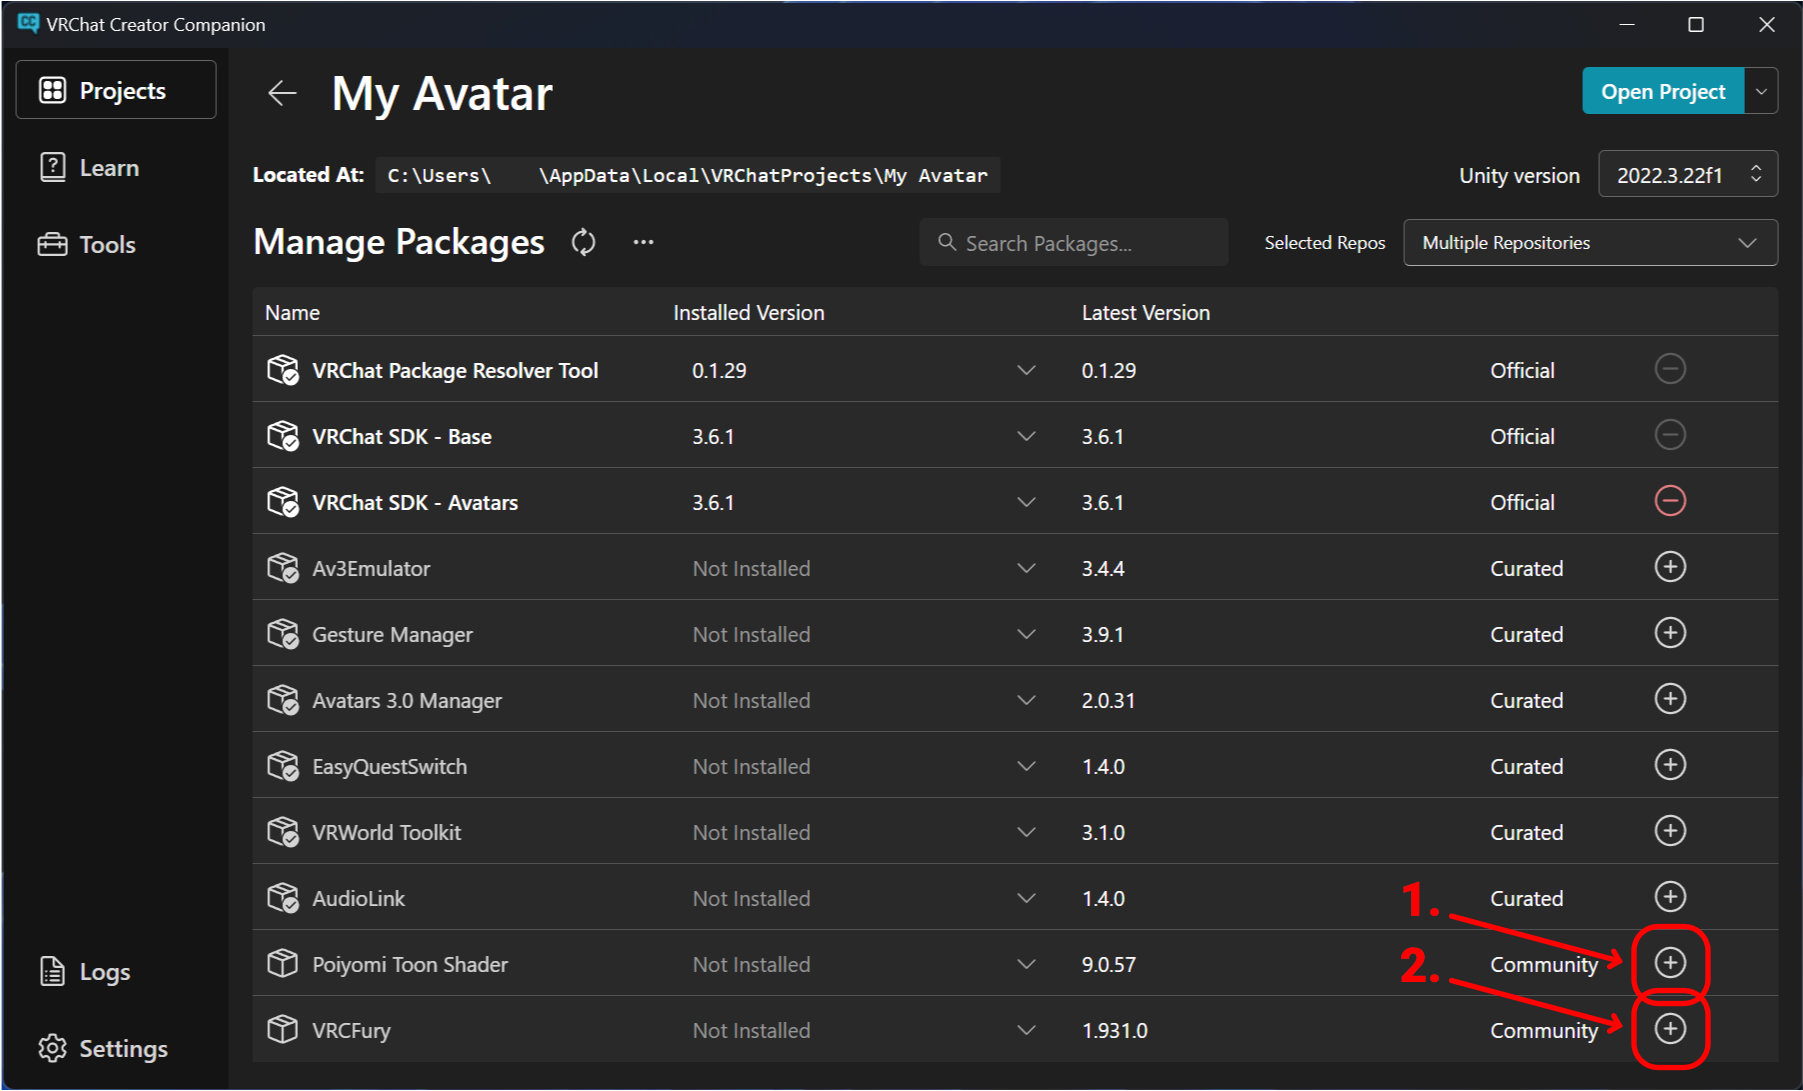
Find the packages "Poiyomi Toon Shader" and "VRCFury" in the list of packages and click the plus button icon to add them.
For Everglade, this is the complete list of packages you will need to upload an Avatar.
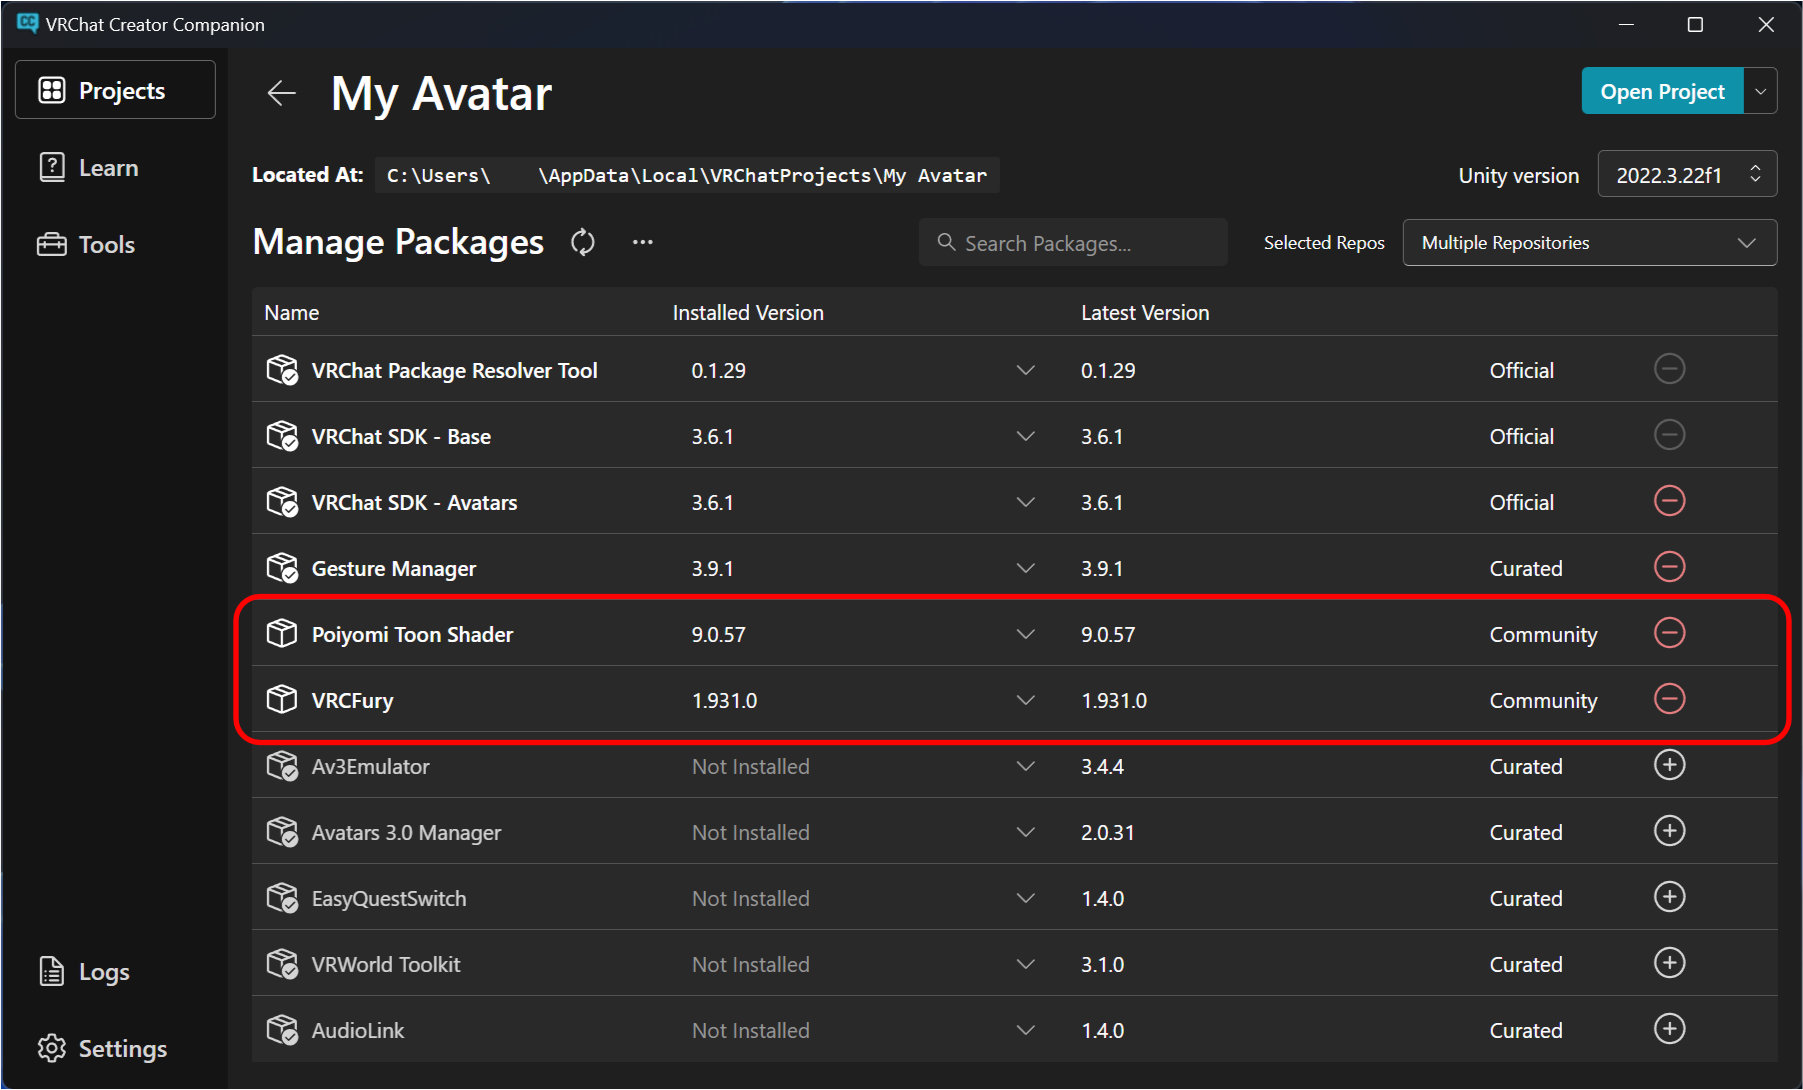
Don't mind the exact version numbers in these screenshots, use a version closest to what is listed in the requirements for the Avatar you want to upload - later versions are usually okay, but expect older version to break things!
Step 3 - Import the Avatar
It's time to set up the project! You can open the project either from your Projects list or from the Manage Project page of a project.
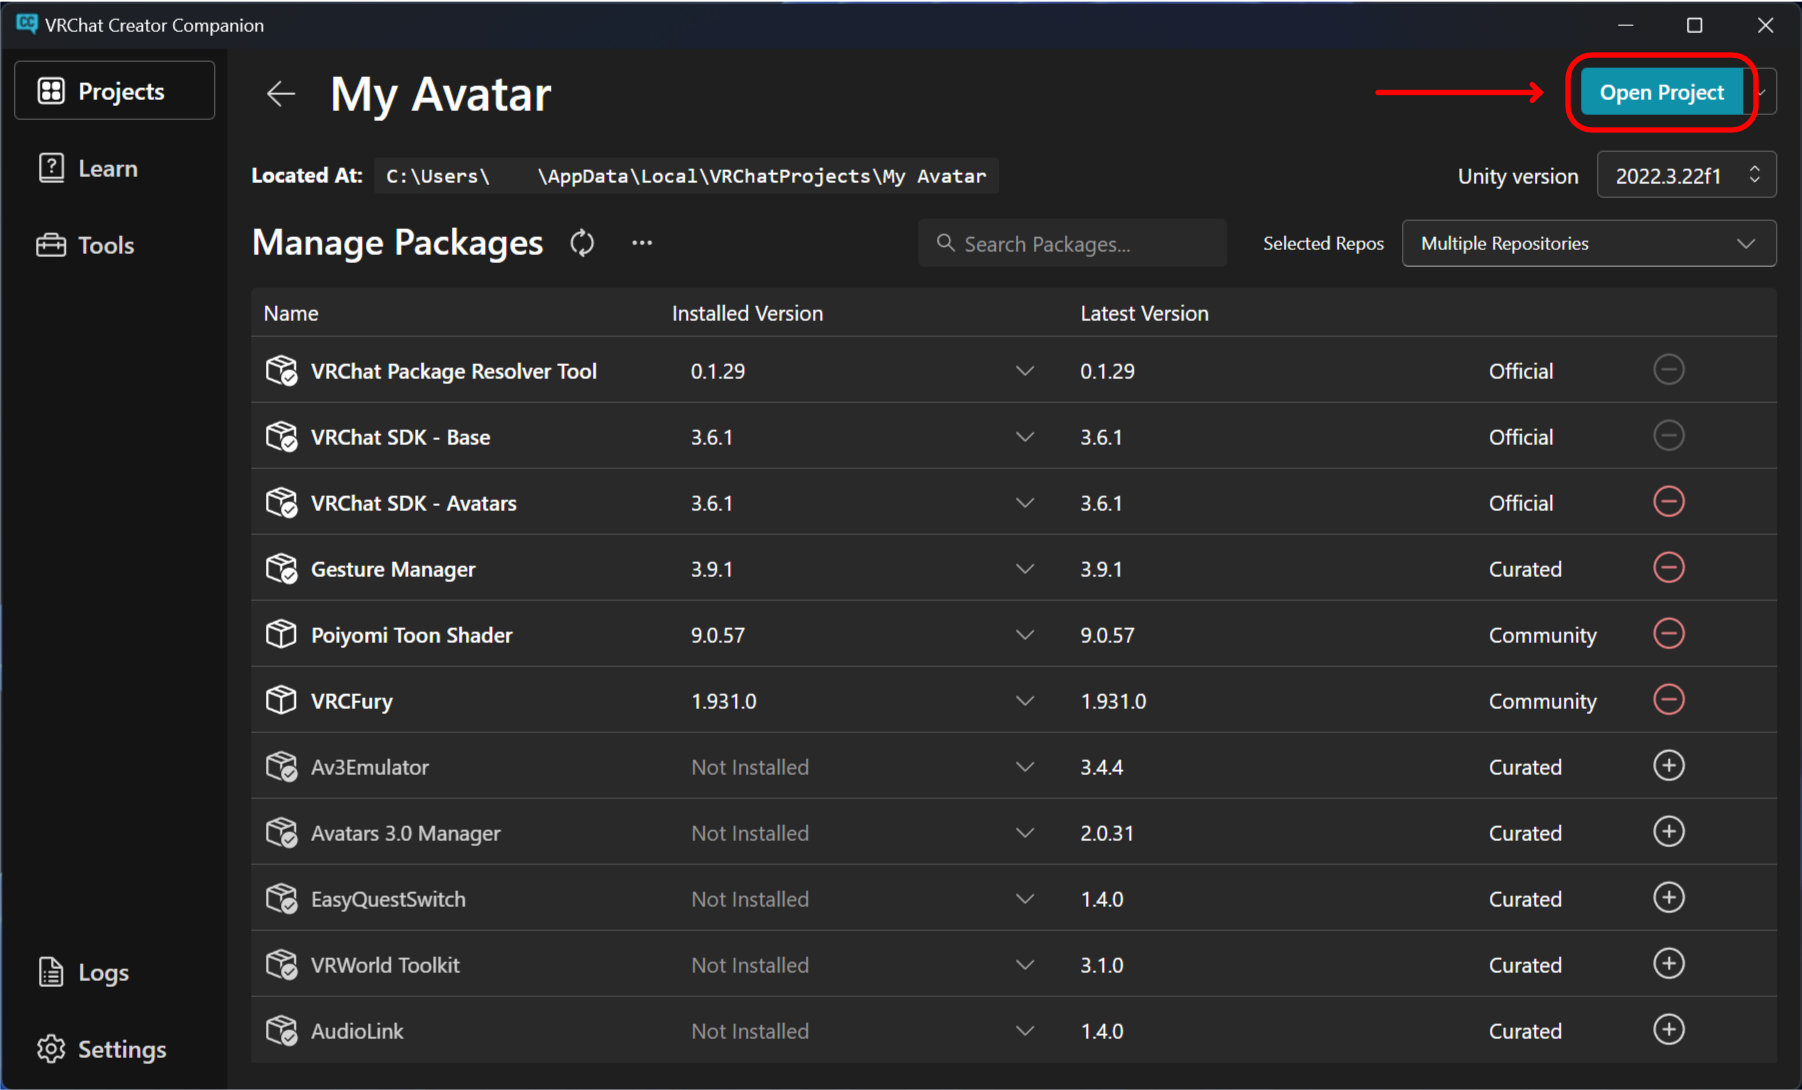
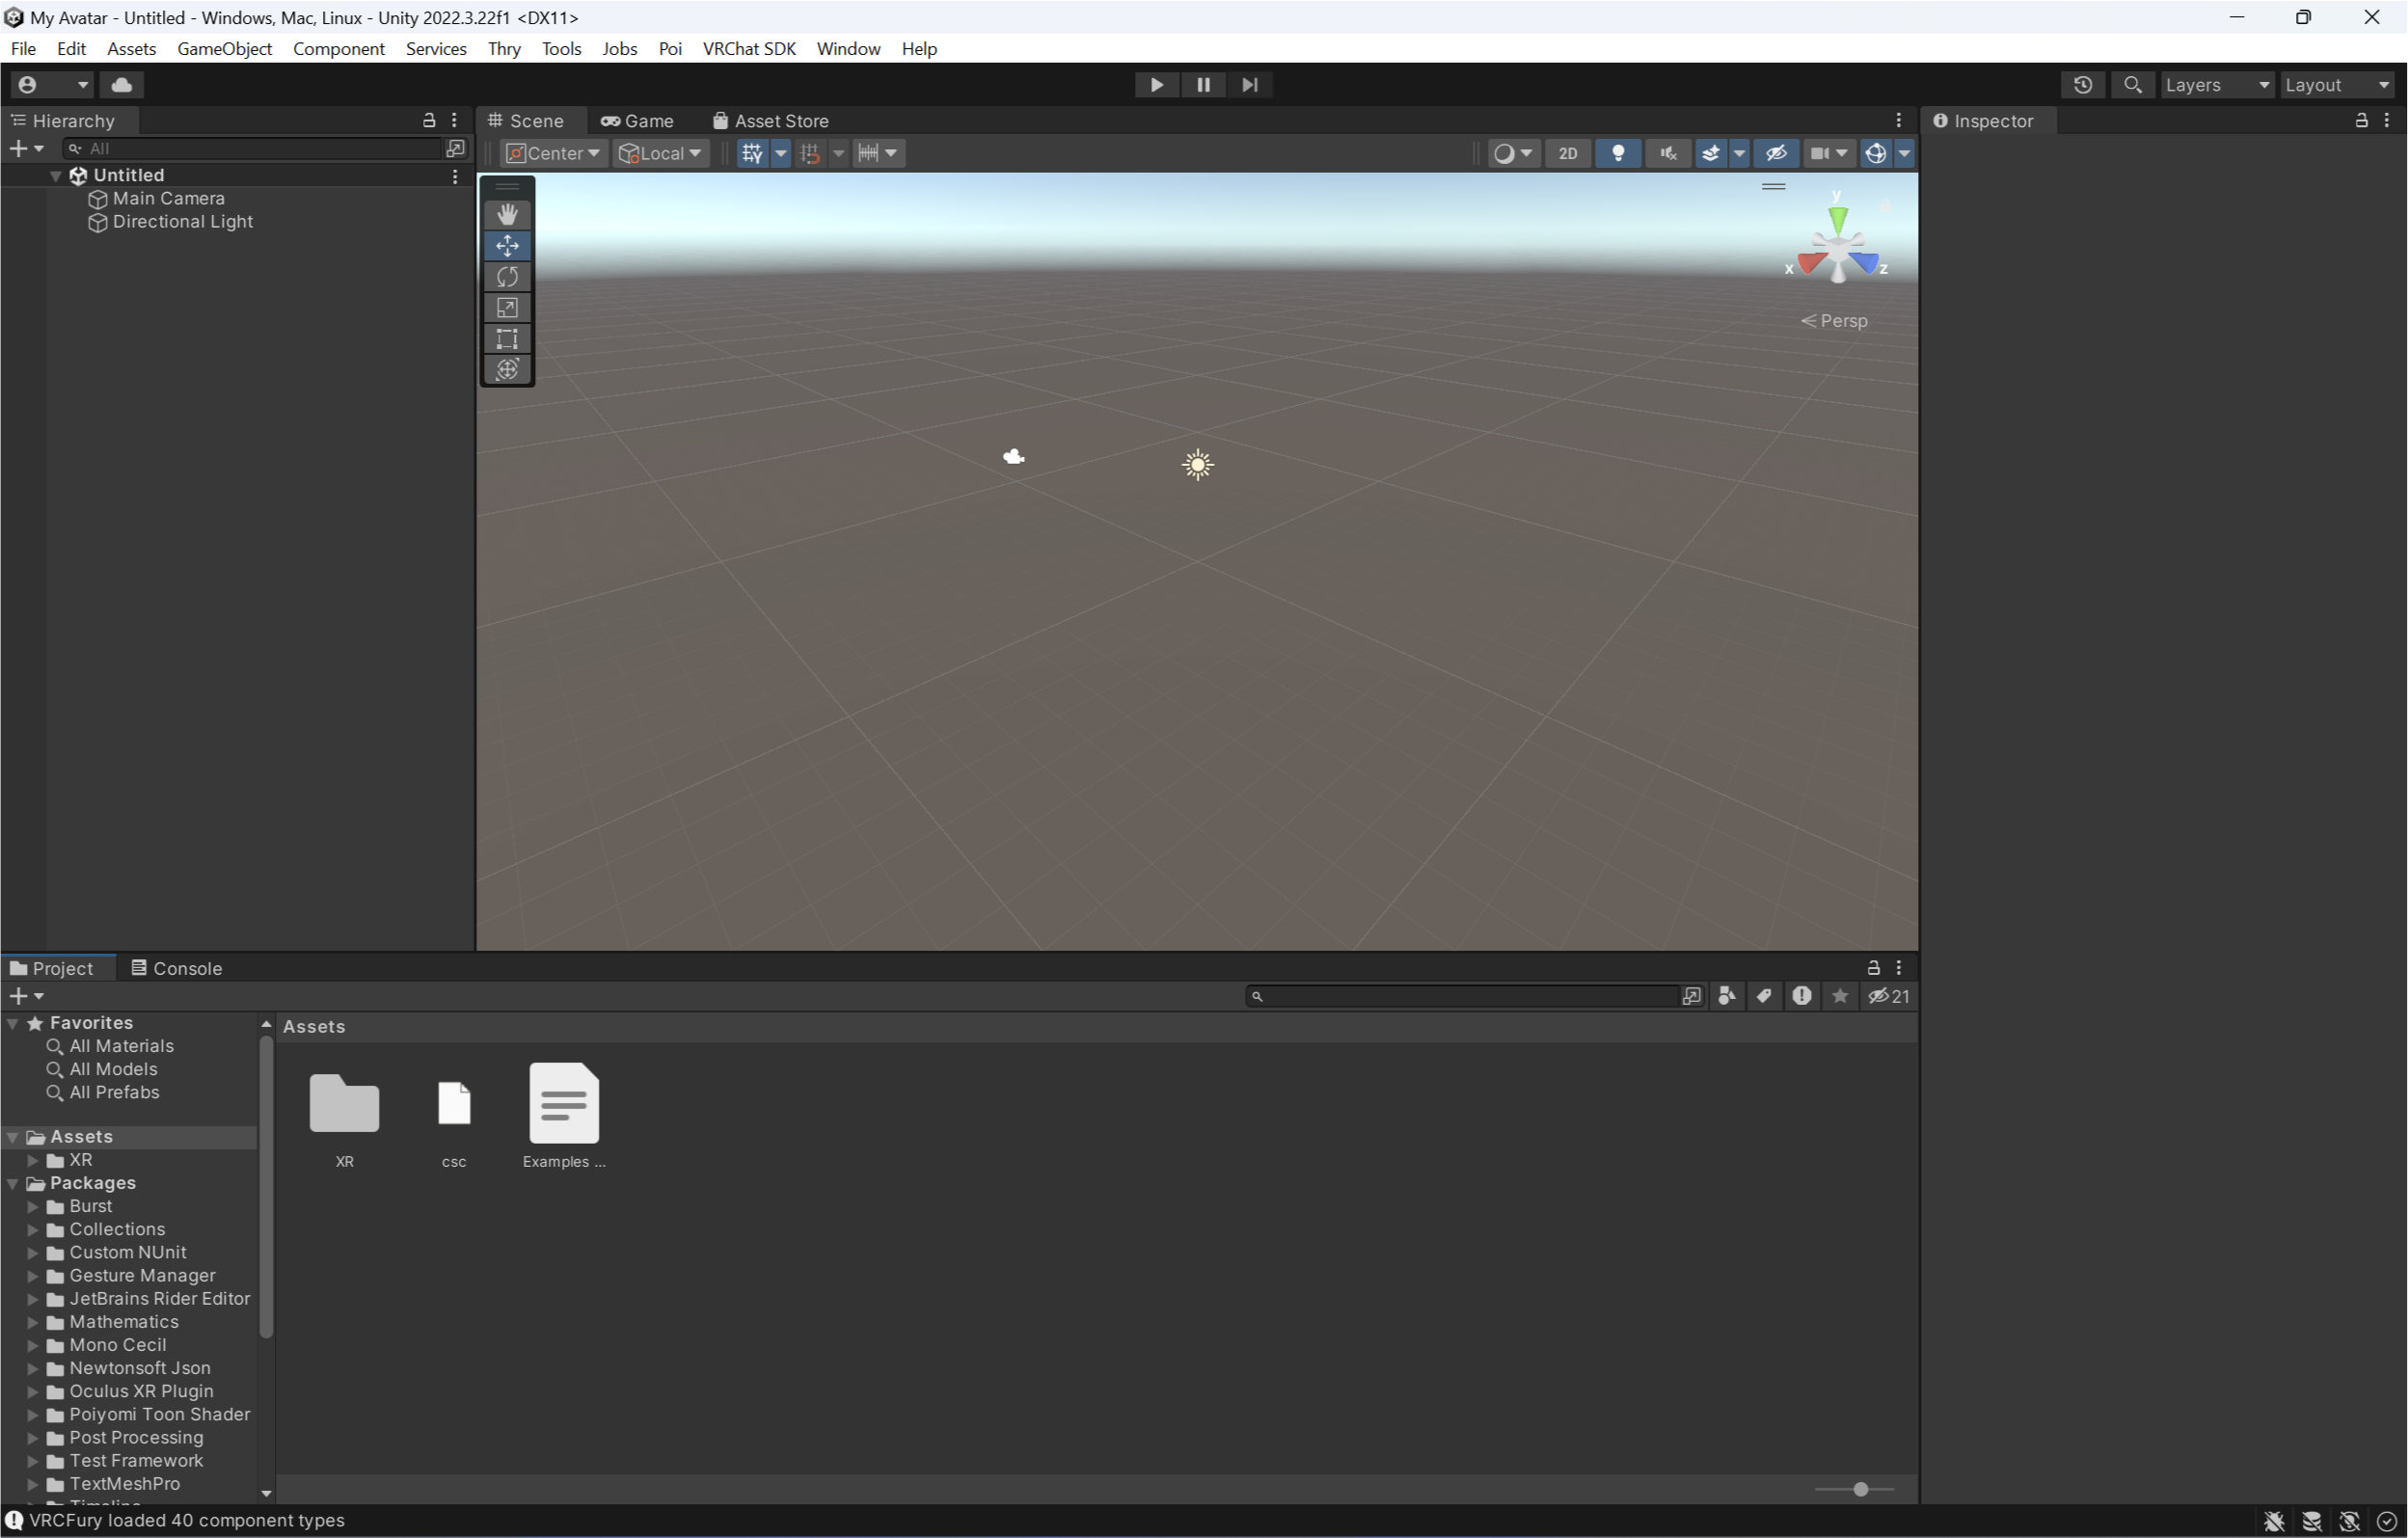
For your new project, Unity will open to a blank scene with only a Camera and a Directional Light.
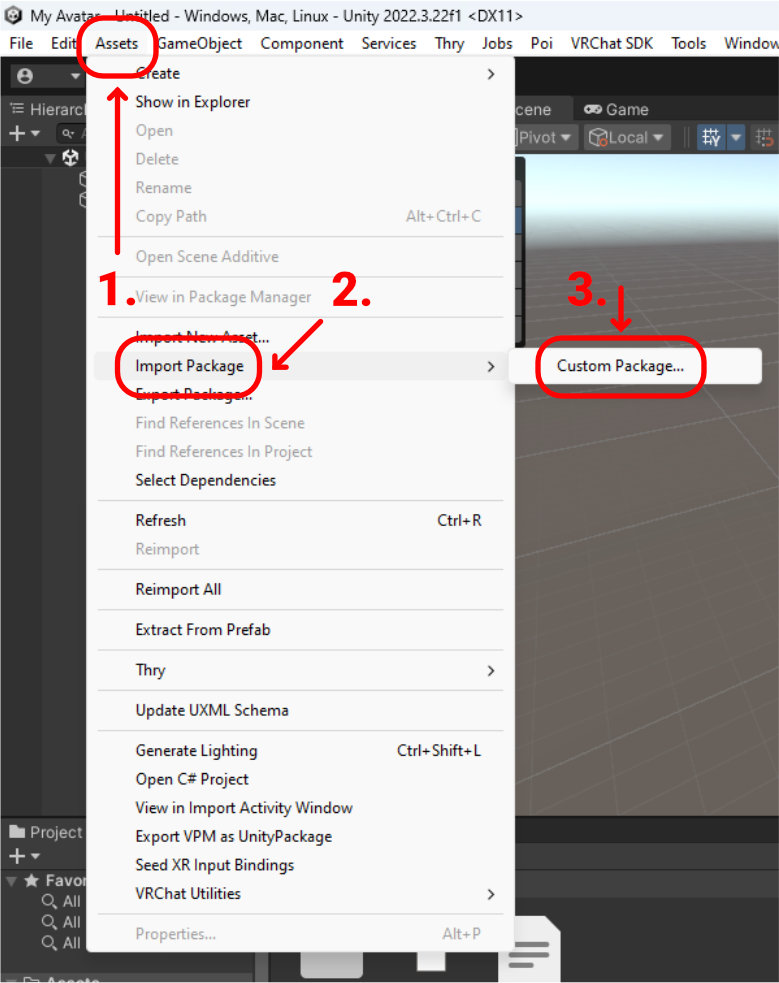
To import the Avatar, from the Unity window's Menu Bar navigate to Assets / Import Package... / Import Custom Package. Locate the .unitypackage file for the Avatar you want to upload. If you haven't already downloaded the file, you can find and download the .unitypackage file from the product's page in your Gumroad Library.
You can also import Unity Packages by dragging the file on top of Unity's Project panel, or if the filetype is associated with Unity (the file has a Unity icon) you can simply double click on the .unitypackage file to import it.
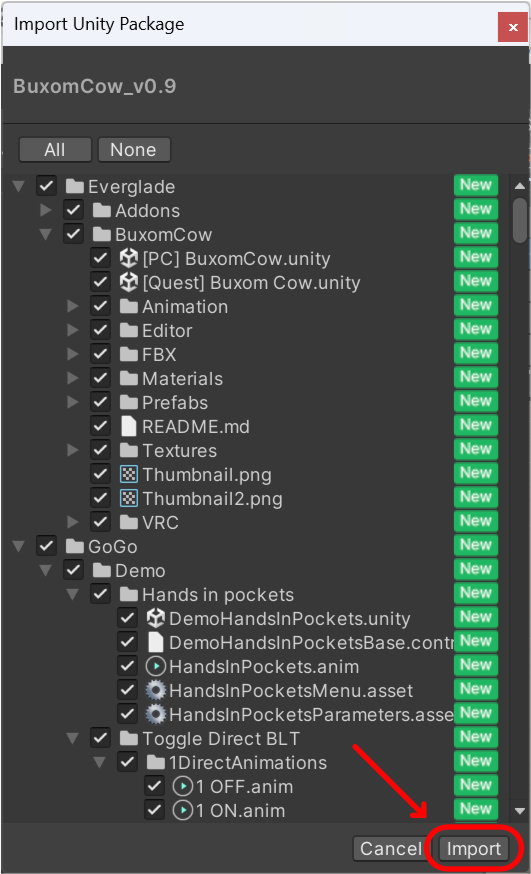
The "Import Unity Package" window will appear. All the items in the list will be ticked by default. Click the Import button in the bottom right corner of the window to complete the import.
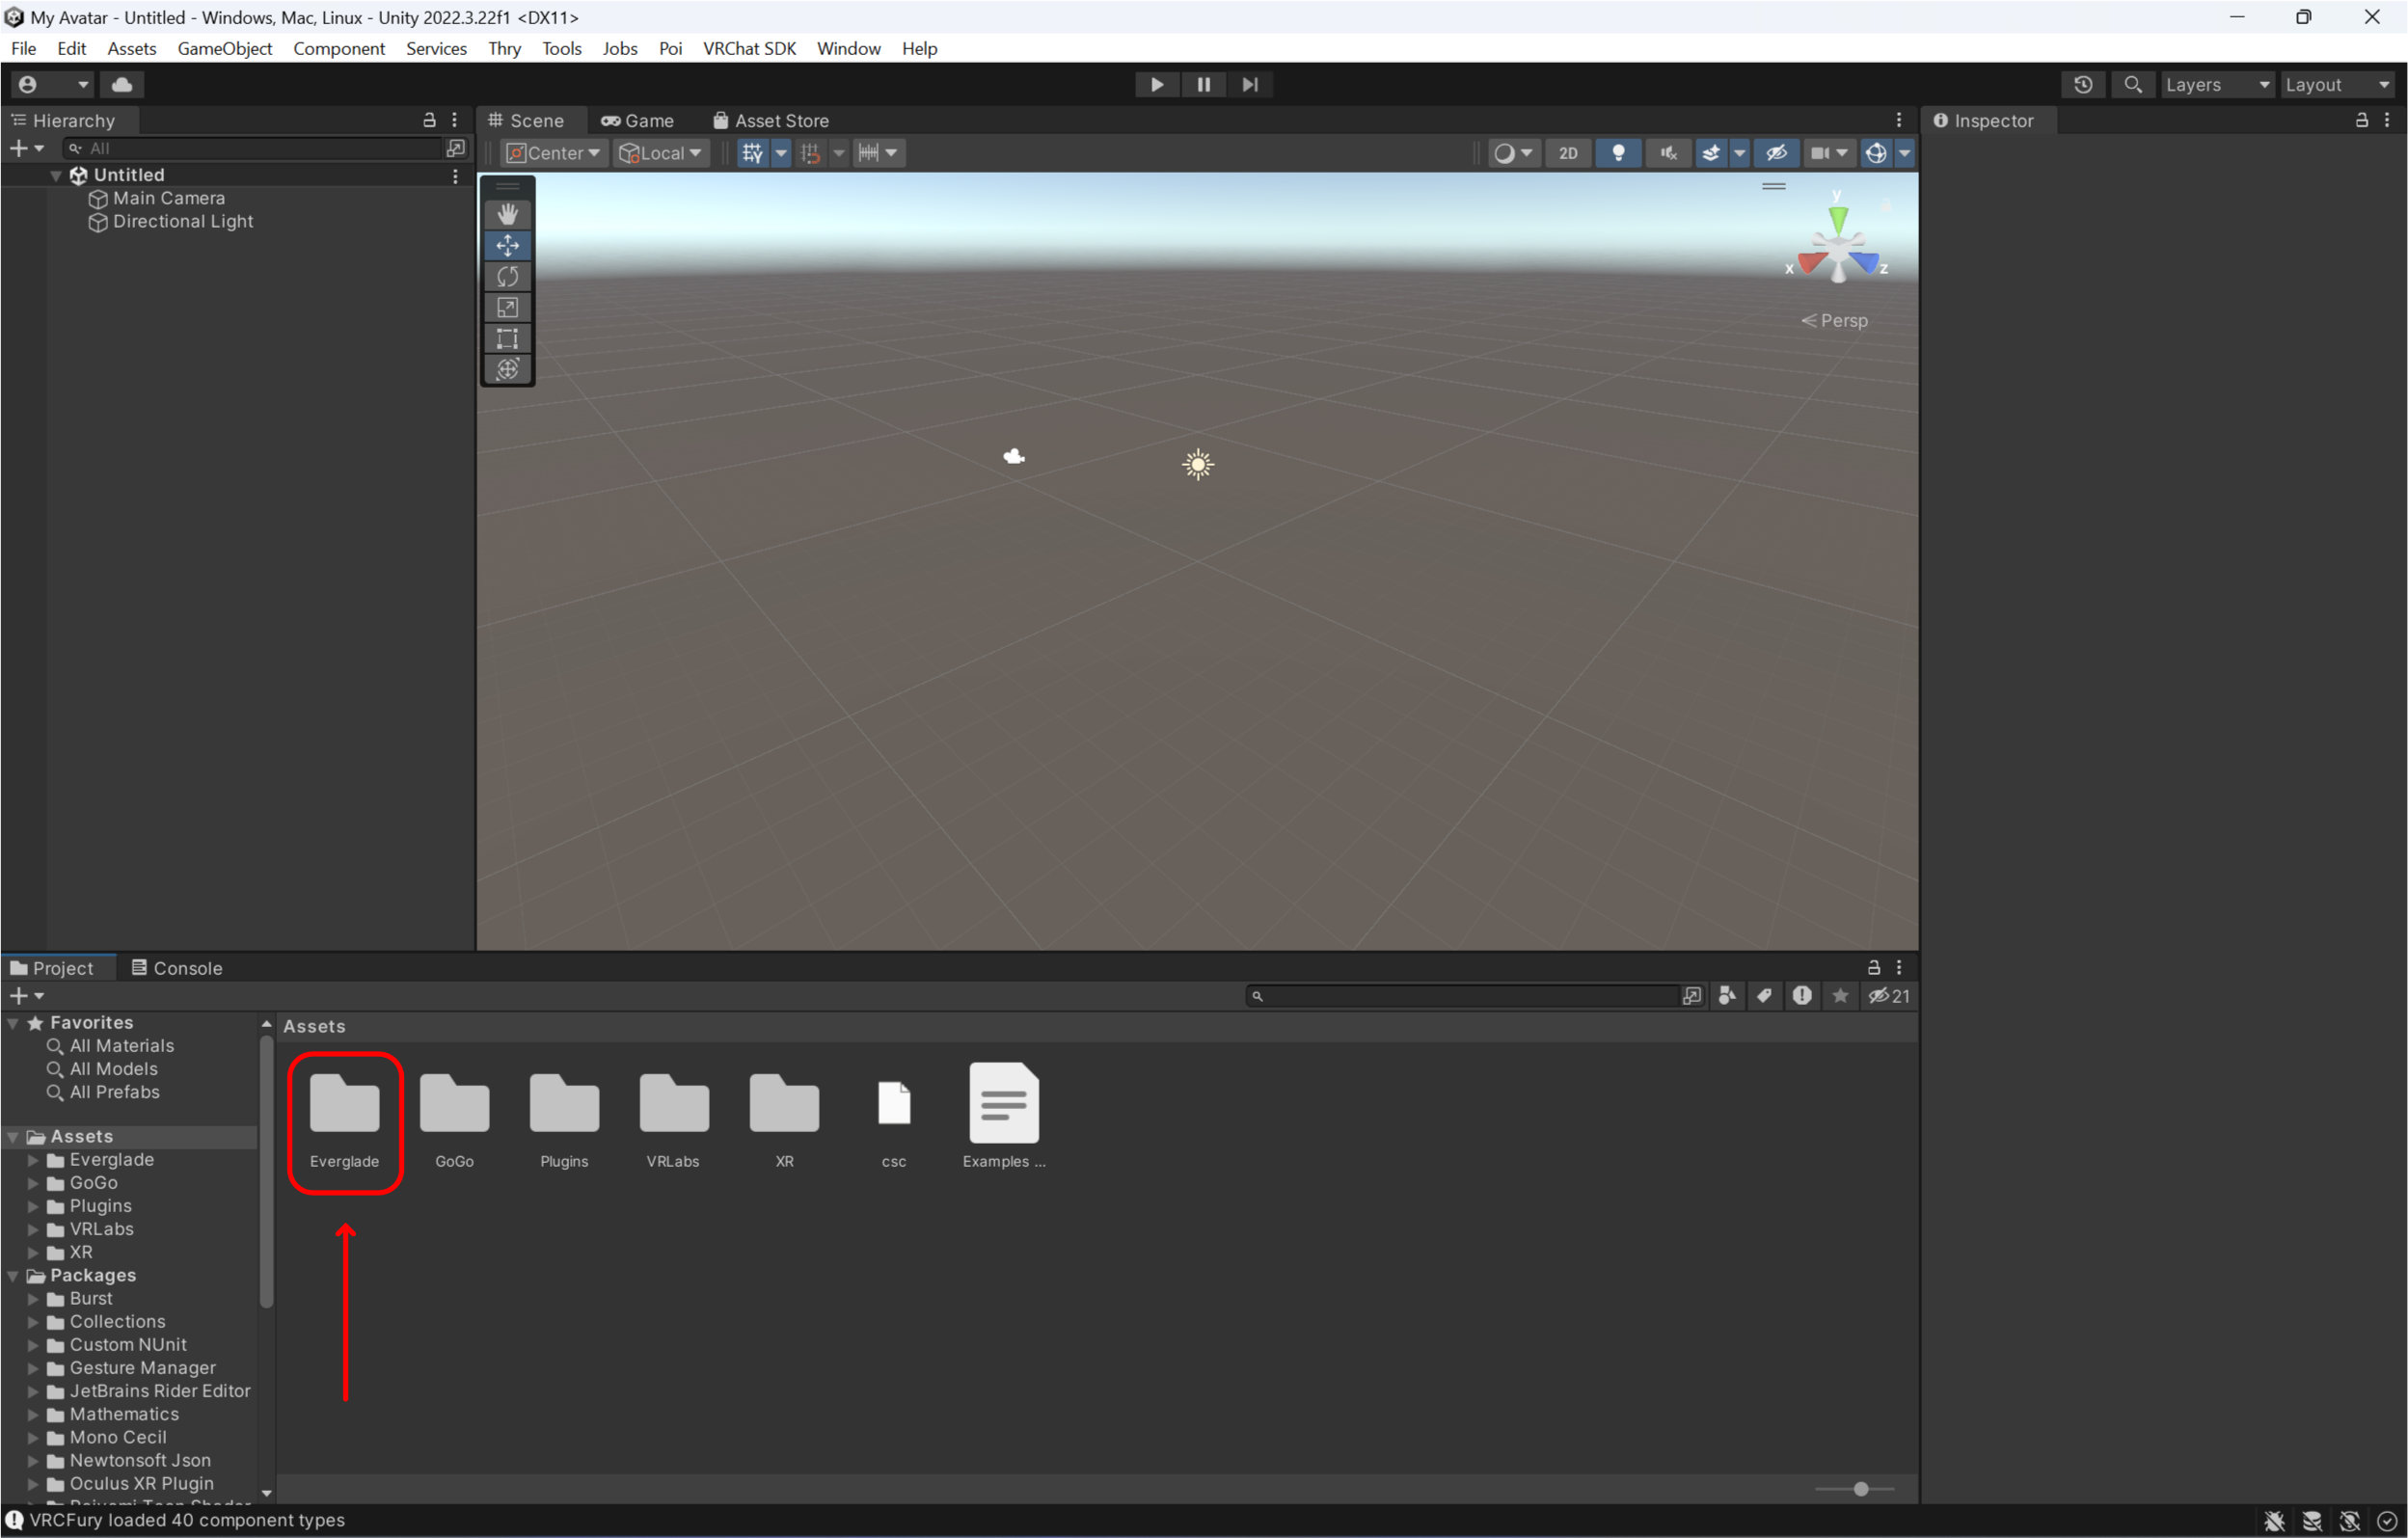
The newly imported folders and assets will have appeared in the Project panel.
Step 4 - Open the Scene
Most Avatar products (such as those from Everglade) will come with a scene that has the Avatar set up and ready for upload. But first, you need to find that scene file and open it. For Everglade products, you can find the scenes under the folder with the Avatar's name inside the Everglade folder. For example, Everglade/BuxomCow/[PC] BuxomCow.scene. Navigate the folders until you find a Unity icon as shown in the screenshot below. Double click on the Scene asset to load it.
![]()
If finding the scene proves difficult, you can filter by type scene in the project window to find all the scenes that exist in the project. Furthermore, if you select the Scene asset and then press the X to clear search, it will navigate you to the containing folder.
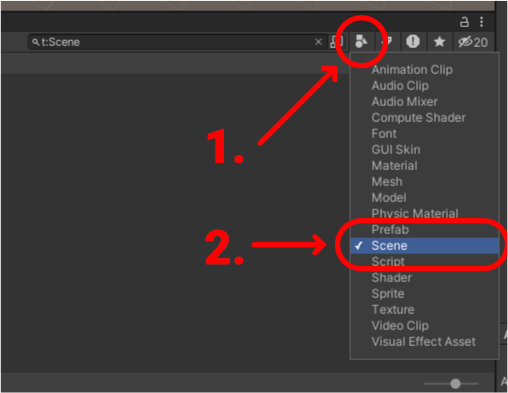
The scene will load into the Unity Editor. You're almost there! Time to upload the Avatar.
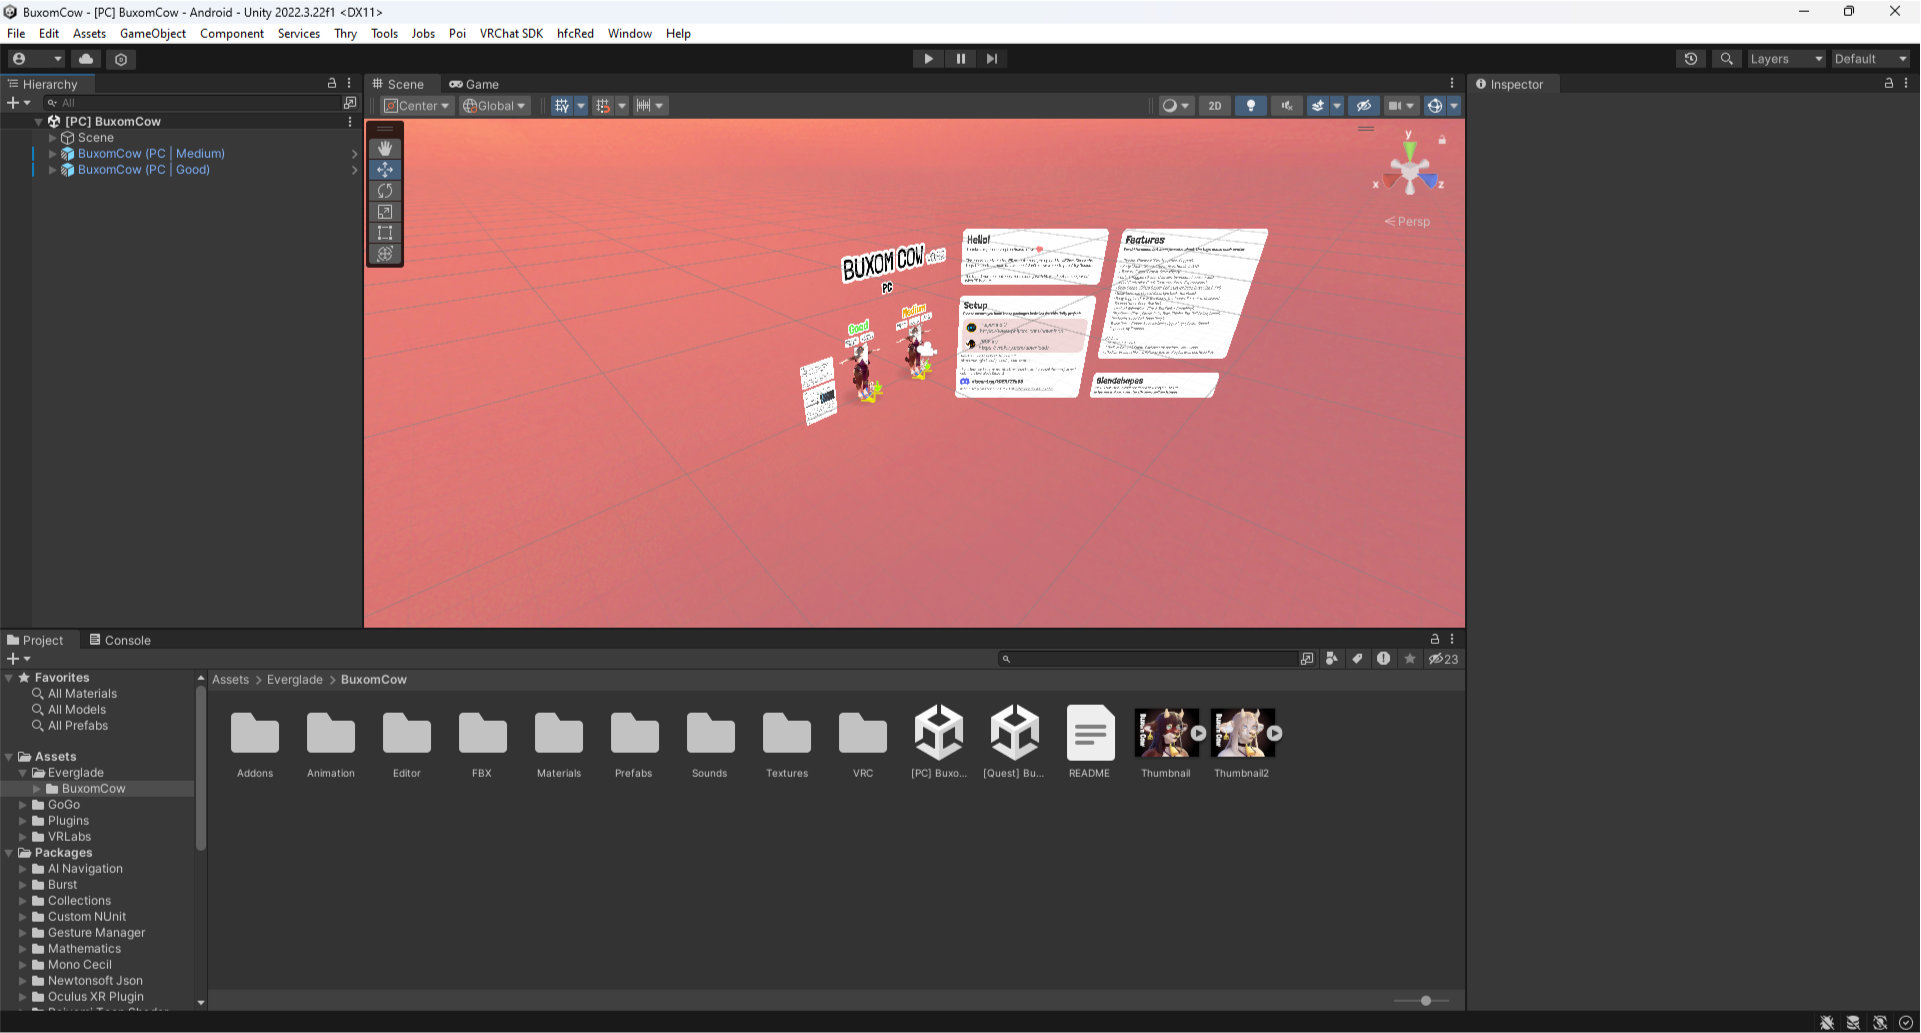
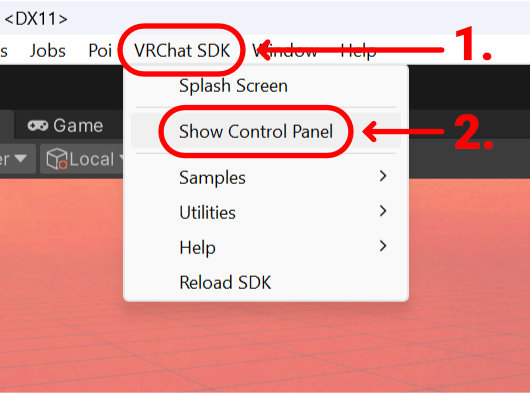
Step 5 - Open the VRChat SDK Control Panel
Find the "VRChat SDK" menu toward the end of Unity's Menu Bar. Select "Show Control Panel" from the dropdown menu.
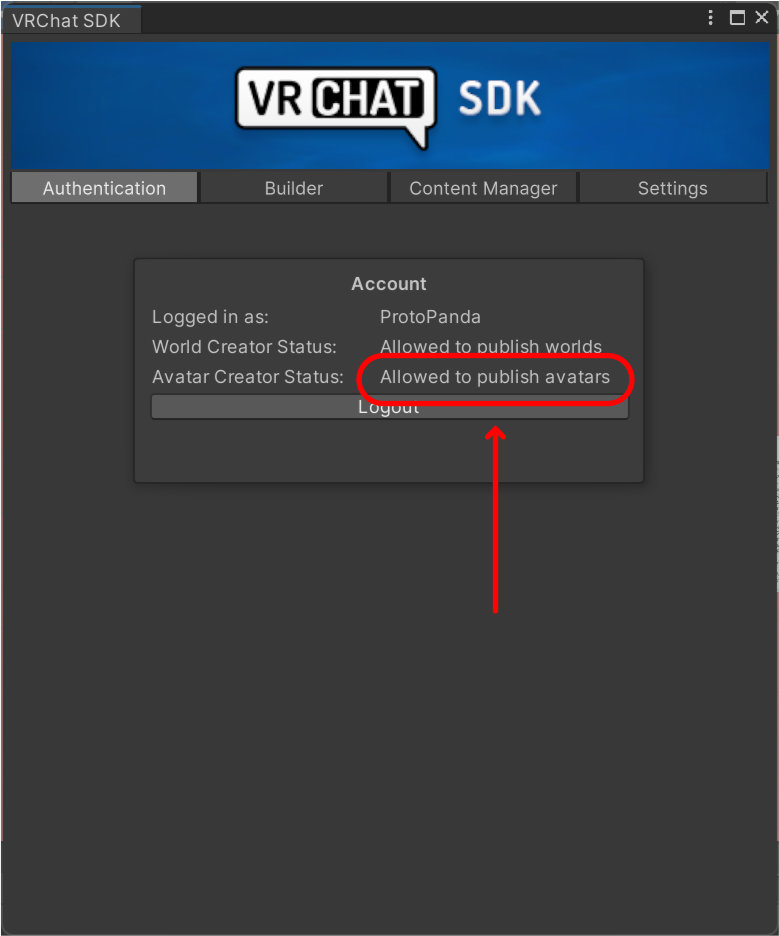
If you haven't already, you'll need to authenticate with your VRChat Login details in the panel that appears.
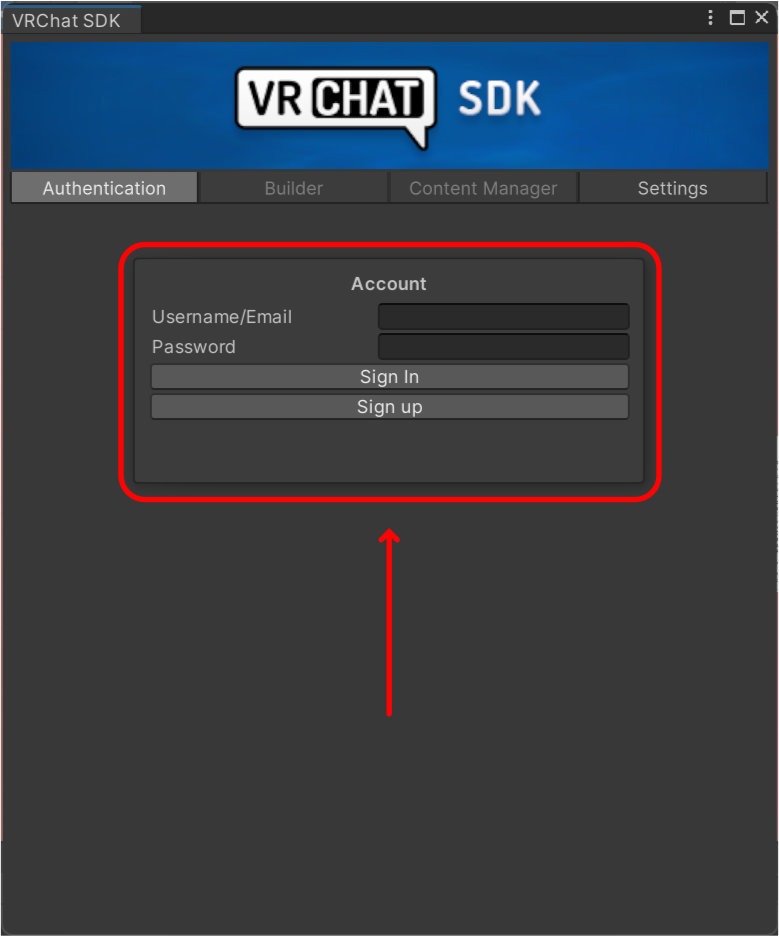
After you've signed in, your Avatar Creator Status should read "Allowed to publish avatars".
Step 6 - Fill out the Avatar information
Change to the Builder Tab in the SDK Control Panel. Fill out the required fields accordingly, giving your avatar a Name, Description (optional), and indicating the relevant Content Warnings if necessary.
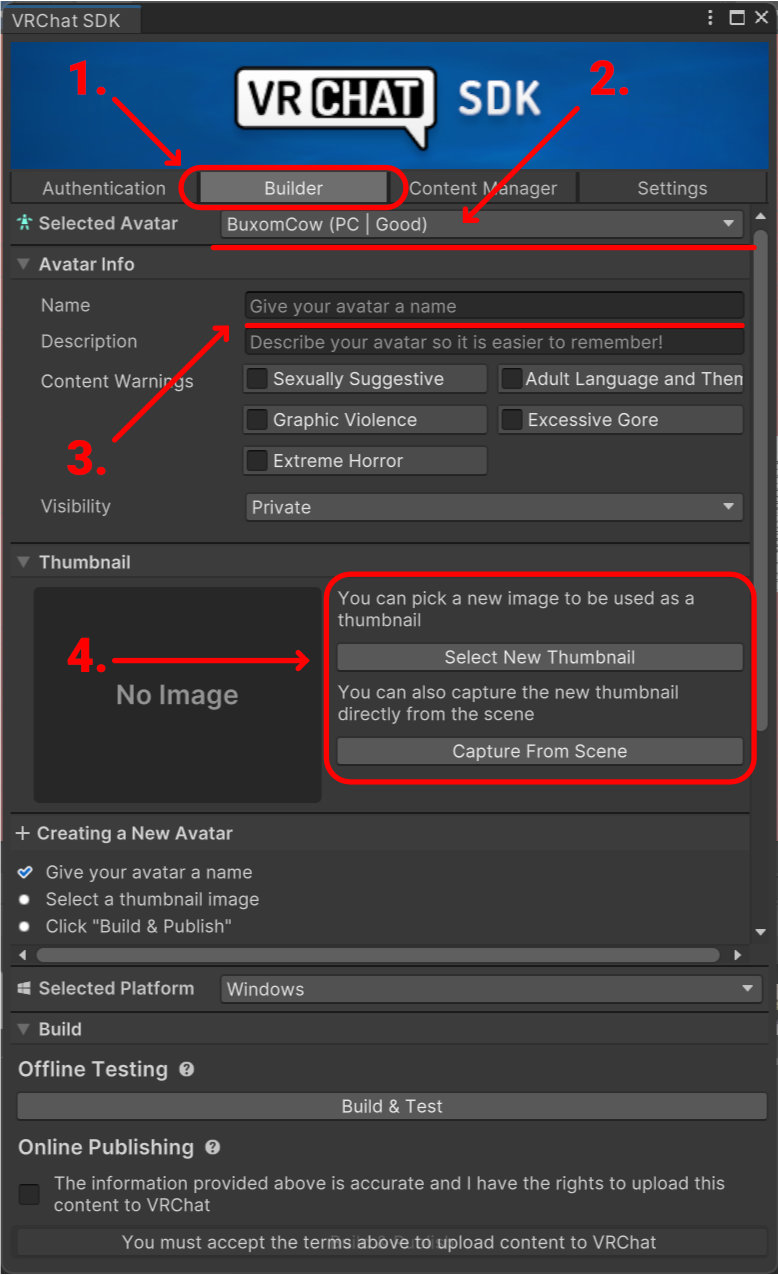
Step 6.1 - Setting a Thumbnail
If you do not wish to capture a custom thumbnail, Everglade products come with a Thumbnail image that you can find in the folder of the Avatar's name. Click "Select New Thumbnail..." and locate the Avatar folder in your project to find the Thumbnail.png.
Step 7 - Publish
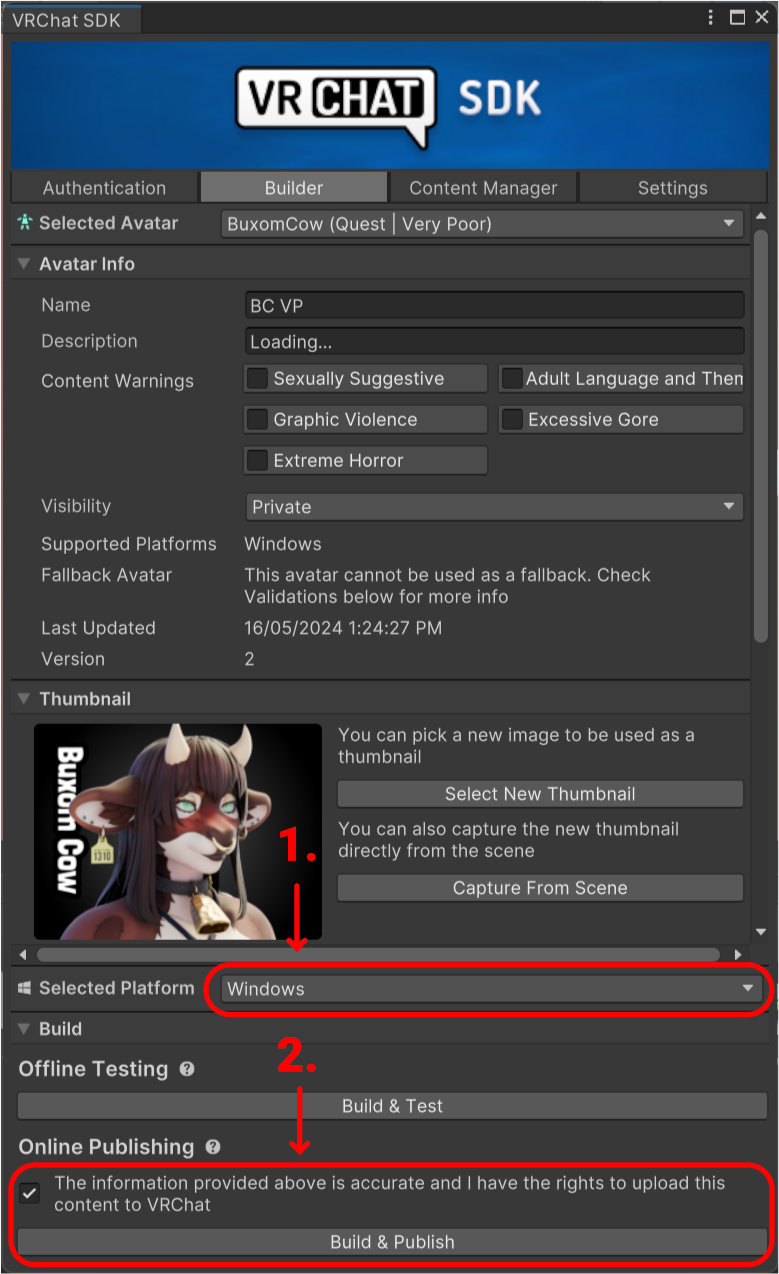
If publishing for Windows, ensure the Selected Platform is set to Windows. Accept the VRChat terms and then click Build & Publish. Done!
If the upload fails, check Unity's console panel for any errors to identify what may have gone wrong. If you're unsure why and need help, you can ask for help in the Everglade Discord server. When asking for help, be sure to include a screenshot of any errors to help others to understand what could be happening!
Discord